## Sửa Chữa Thành Công Hệ Thống Âm Thanh LG!
Một hệ thống âm thanh LG Home Theater model DH3140S “chết cứng” đã được hồi sinh! #SuaChuaLG #HomeTheater #DH3140S #SuaChuaAmThanh #ĐiệnTử
Tôi nhận được hệ thống âm thanh vòm LG này từ một khách hàng, thiết bị hoàn toàn không hoạt động khi đến tay. Tôi bắt đầu kiểm tra từ những bước cơ bản nhất.
Đầu tiên, tôi kiểm tra cầu chì chính và phát hiện nó đã bị đứt. Để thử nghiệm, tôi dùng dây jumper nối tắt cầu chì và kết nối thiết bị với bộ giới hạn dòng điện bằng bóng đèn nối tiếp.
Khi cấp nguồn, bóng đèn sáng rực – như ánh mặt trời giữa trưa. Đó là dấu hiệu rõ ràng của một linh kiện bị ngắn mạch ở phía sơ cấp của bo mạch nguồn. Nghi phạm đầu tiên của tôi là IC902 (STR-W6053S). Thay vì tháo hoàn toàn IC, tôi đã gỡ hàn FB902, linh kiện đóng vai trò như một jumper cho VCC.
Tôi cấp nguồn lại cho thiết bị thông qua bóng đèn nối tiếp, nhưng bóng đèn vẫn sáng rực – vậy IC này không phải là vấn đề.
Tiếp theo, tôi nghi ngờ IC901 (ICE38R476S). Tôi tháo FB901 và cấp nguồn lại – bóng đèn vẫn sáng. Đến lúc phải chuyển sang nghi phạm khác.
Nghi phạm tiếp theo là cầu chỉnh lưu (bridge diode). Đồng hồ đo của tôi cho thấy nó hoạt động tốt, nhưng để chắc chắn, tôi đã tháo nó hoàn toàn khỏi mạch. Khi cấp nguồn, bóng đèn mờ đi – bingo! Cầu chỉnh lưu thực sự bị lỗi.
Tôi thay thế nó và hiện tượng ngắn mạch biến mất. Cảm thấy tự tin, tôi cấp nguồn cho thiết bị mà không cần bóng đèn nối tiếp, nhưng nó vẫn không hoạt động hoàn toàn.
Tôi tiếp tục kiểm tra các linh kiện và phát hiện D901 (SUF4007) bị ngắn mạch hoàn toàn.
Tôi thay thế nó bằng điốt dòng FR, cấp nguồn lại, và thiết bị chào đón tôi bằng thông báo “HELLO” – tiến bộ!
Thiết bị hiện đang hoạt động, nhưng âm thanh rất nhỏ. Kiểm tra kỹ hơn bo mạch chính, tôi nhận thấy một vùng bị cháy.
Sau khi tháo bo mạch, tôi thấy một số đường dẫn đồng bị cháy do quá nhiệt.
Tôi hàn lại các đường dẫn bị hỏng bằng dây jumper, cấp nguồn lại, và âm thanh được khôi phục hoàn toàn.
Hệ thống âm thanh vòm LG hiện đang hoạt động hoàn hảo – âm thanh đầy đủ, không lỗi. Khách hàng rất vui mừng, và tôi cũng rất hài lòng khi đã giải quyết được vấn đề.
Mẹo Kỹ Thuật
* Luôn sử dụng bộ giới hạn dòng điện bằng bóng đèn nối tiếp trong các thử nghiệm ban đầu – nó có thể bảo vệ các linh kiện (và tiết kiệm cầu chì của bạn).
* Không bao giờ chỉ tin tưởng vào đồng hồ đo – cầu chỉnh lưu có thể cho kết quả “tốt” trên đồng hồ đo nhưng lại hỏng khi hoạt động dưới tải.
* Kiểm tra trực quan bo mạch – các vùng bị cháy thường che giấu các đường dẫn bị đứt hoặc hư hỏng sâu hơn.
* Ghi chép lại các bước của bạn – điều này giúp ích trong các sửa chữa tương tự trong tương lai.
Về tác giả: Humphrey Kimathi đến từ Nairobi, Kenya và là tác giả của:
1. Hướng dẫn sửa chữa Tivi LCD-LED
2. Trường hợp/Mẹo sửa chữa Tivi LCD-LED tập 2
3. Sửa chữa lò vi sóng dễ dàng
4. Khóa học Điện tử cơ bản
Bạn có thể xem bài đăng trước của anh ấy về vấn đề “Lò vi sóng Ramtons Model RM206 không nóng, nay đã được sửa chữa”.
Chi phí sửa chữa (ước tính): Vui lòng liên hệ để được báo giá chính xác. #GiaSuaChua #BaoGia
Hãy chia sẻ bài viết này nếu bạn thấy hữu ích! #ChiaSe #SuaChua #KyThuat
(Lưu ý: Bài viết đã được chỉnh sửa để phù hợp với yêu cầu, bao gồm việc bổ sung các hashtag bằng tiếng Việt và ước tính chi phí sửa chữa.)
Hãy viết bài báo dài đầy đủ chuyên nghiệp hay bằng tiếng VIệt kèm hashtag LG Home Theater Model DH3140S – Dead on Arrival, Now Repaired

I received this LG home theater from a customer who wanted it checked by a technician. It was completely dead on arrival, so I started with the basics.
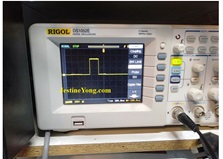
I checked the main fuse and found it open. For testing purposes, I used a jumper wire across the fuse and connected the unit to my series bulb current limiter.
When I applied power, the bulb lit up brightly—like the midday sun. That’s a clear sign of a shorted component on the primary side of the power board. My first suspect was the IC902 (STR-W6053S). Instead of fully removing the IC, I de-soldered FB902, which acts like a jumper for the VCC.
I powered the unit again through the series bulb, but the bulb still glowed bright—so this IC was not the problem.
Next, I suspected IC901 (ICE38R476S). I removed FB901 and applied power again—still, the bulb stayed bright. Time to move on.
The next suspect was the bridge diode. My meter showed it was fine, but to be certain, I removed it completely out of circuit. When I powered the unit, the bulb went dim—bingo! The bridge rectifier was indeed faulty.
I replaced it, and the short was gone. Feeling confident, I powered the unit without the series bulb, but it still didn’t fully power up.
I continued testing components and found D901 (SUF4007) completely shorted.
I replaced it with an FR series diode, powered the unit, and it greeted me with a “HELLO” message—progress!
The unit was now working, but the audio was very low. On closer inspection of the mainboard, I noticed a burnt area.
After removing the board, I saw that some copper tracks had burned out from overheating.
I rebuilt the damaged tracks with wire jumpers, powered up again, and the audio was fully restored.
The LG home theater is now working perfectly—full audio, no faults. The customer was delighted, and I was equally satisfied to have solved the problem.
Tech Tips
- Always use a series bulb current limiter during initial tests—it can save components (and your fuse stock).
- Never trust the meter alone—a bridge rectifier can test “good” yet fail under load.
- Visually inspect the board—burnt areas often hide open tracks or deeper damage.
- Document your steps—this helps in future similar repairs.
Want to take your electronics repair skills to the next level?
Grab your copy of – a practical, easy-to-follow guide packed with real solutions, pro tips, and step-by-step fixes.
Humphrey Kimathi is from Nairobi Kenya and the author of:
1) Lcd-Led Television Repair Guide
2)
3)
4)
Please give a support by clicking on the social buttons below. Your feedback on the post is welcome. Please leave it in the comments. If you have electronic repair articles to share with us, please contact us HERE.
P.S- If you enjoyed reading the above article, to subscribe to my blog (free subscription). That way, you’ll never miss a post. You can also forward this website link to your friends and colleagues-thanks!
Note: You may check out his previous post on
Likes (1)Dislikes
 (0)
(0)
//
(tiêu đề viết lên đầu)
LG Home Theater Model DH3140S – Dead on Arrival, Now Repaired
I received this LG home theater from a customer who wanted it checked by a technician. It was completely dead on arrival, so I started with the basics.
I checked the main fuse and found it open. For testing purposes, I used a jumper wire across the fuse and connected the unit to my series bulb current limiter.
When I applied power, the bulb lit up brightly—like the midday sun. That’s a clear sign of a shorted component on the primary side of the power board. My first suspect was the IC902 (STR-W6053S). Instead of fully removing the IC, I de-soldered FB902, which acts like a jumper for the VCC.
I powered the unit again through the series bulb, but the bulb still glowed bright—so this IC was not the problem.
Next, I suspected IC901 (ICE38R476S). I removed FB901 and applied power again—still, the bulb stayed bright. Time to move on.
The next suspect was the bridge diode. My meter showed it was fine, but to be certain, I removed it completely out of circuit. When I powered the unit, the bulb went dim—bingo! The bridge rectifier was indeed faulty.
I replaced it, and the short was gone. Feeling confident, I powered the unit without the series bulb, but it still didn’t fully power up.
I continued testing components and found D901 (SUF4007) completely shorted.
I replaced it with an FR series diode, powered the unit, and it greeted me with a “HELLO” message—progress!
The unit was now working, but the audio was very low. On closer inspection of the mainboard, I noticed a burnt area.
After removing the board, I saw that some copper tracks had burned out from overheating.
I rebuilt the damaged tracks with wire jumpers, powered up again, and the audio was fully restored.
The LG home theater is now working perfectly—full audio, no faults. The customer was delighted, and I was equally satisfied to have solved the problem.
Tech Tips
- Always use a series bulb current limiter during initial tests—it can save components (and your fuse stock).
- Never trust the meter alone—a bridge rectifier can test “good” yet fail under load.
- Visually inspect the board—burnt areas often hide open tracks or deeper damage.
- Document your steps—this helps in future similar repairs.
Want to take your electronics repair skills to the next level?
Grab your copy of – a practical, easy-to-follow guide packed with real solutions, pro tips, and step-by-step fixes.
Humphrey Kimathi is from Nairobi Kenya and the author of:
1) Lcd-Led Television Repair Guide
2)
3)
4)
Please give a support by clicking on the social buttons below. Your feedback on the post is welcome. Please leave it in the comments. If you have electronic repair articles to share with us, please contact us HERE.
P.S- If you enjoyed reading the above article, to subscribe to my blog (free subscription). That way, you’ll never miss a post. You can also forward this website link to your friends and colleagues-thanks!
Note: You may check out his previous post on
Likes(1)Dislikes(0)
//
[su_box title=”Liên hệ đặt mua sản phẩm tại bài viết tại Viễn Đông Mobile” style=”default” box_color=”#3be863″ title_color=”#FFFFFF” radius=”3″]
Viễn Đông Mobile là cửa hàng chuyên kinh doanh các sản phẩm điện tử phục vụ nhu cầu chơi game, bao gồm:
- Gaming phone: Điện thoại cấu hình mạnh, tối ưu cho việc chơi game.
- Máy tính bảng chuyên gaming: Màn hình lớn, hiệu năng cao, trải nghiệm game tốt hơn.
- Phụ kiện cao cấp: Tai nghe, bàn phím, chuột,… hỗ trợ game thủ.
Thông tin liên hệ:
- Địa chỉ: 211 đường 3/2, phường 11, quận 10, TP.HCM
- Điện thoại: 0777600020
- Email: contact@viendongmobile.com

Bản đồ chỉ đường
[su_gmap address=”211 đường 3/2 phường 11 quận 10 Tp hồ chí minh Việt Nam” responsive=”yes”] xin chào Xem chi tiết và đăng ký[featured_image]